Have you ever noticed water pooling on your bathroom floor or damp spots appearing on the wall adjacent to your shower? If so, you might be dealing with a perplexing issue: a leaking shower behind the wall. This elusive problem can be a headache for homeowners, causing not only water damage but also potential mold growth. In this article, we will explore the common causes of shower leaks behind the wall and provide some helpful tips on how to identify and fix this irritating problem. So, if you’re tired of dealing with a perpetually damp bathroom, join us as we unravel the mystery of why showers leak behind the wall.
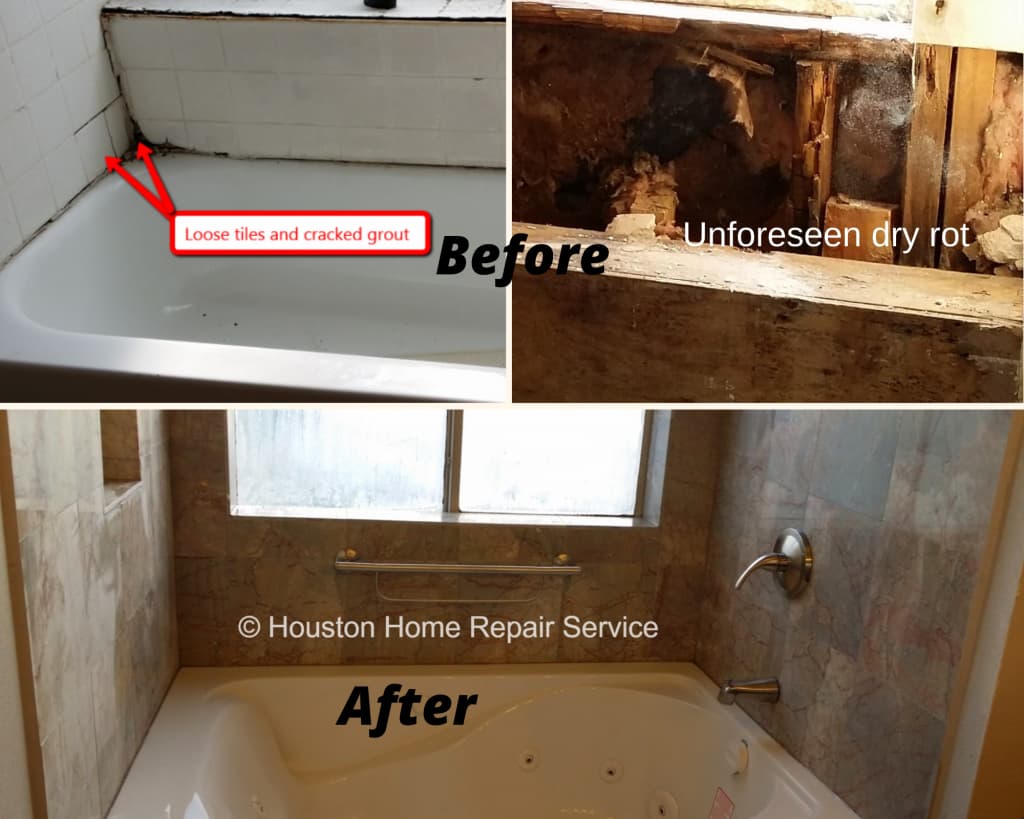
This image is property of timeforremodeling.com.
Table of Contents
Common Causes of Shower Leaks
Worn-out grout or caulk
One common cause of shower leaks is worn-out grout or caulk. Over time, the grout or caulk that seals the gaps between tiles and prevents water from seeping through can deteriorate. As a result, water can easily penetrate these areas and leak behind the wall, causing damage to the bathroom structure and potentially leading to mold and mildew growth.
Damaged or loose tiles
Damaged or loose tiles can also contribute to shower leaks. When tiles are cracked or broken, they create an entry point for water to seep behind the wall. Similarly, if tiles are not properly secured or have become detached, water can find its way into the wall cavity. Inspecting and addressing any damaged or loose tiles is important to prevent leaks and maintain the integrity of the shower.
Faulty plumbing connections
Faulty plumbing connections are another common culprit behind shower leaks. Whether it’s a loose connection, a damaged pipe, or a faulty valve, any issues with the plumbing system can result in water leakage. Even a small drip can eventually lead to significant damage if left unresolved. Regularly inspecting the plumbing connections and addressing any issues promptly can help prevent leaks from occurring.
Incorrectly installed shower pan
A poorly installed shower pan can also be a source of leaks. The shower pan is designed to collect and direct water towards the drain, but if it’s not installed correctly or has become compromised, water can seep through and cause damage to the underlying structure. It’s essential to ensure that the shower pan is installed properly during initial construction or during any renovations to avoid potential leaks.
Cracks in the shower base
Cracks in the shower base can allow water to seep through and cause leaks behind the wall. These cracks may develop due to age, poor installation, or shifts in the foundation. Regularly inspecting the shower base for any signs of damage, such as cracks or crumbling, can help identify potential sources of leaks early on.
Leaking shower valve
If the shower valve is leaking, it can contribute to shower leaks behind the wall. The shower valve regulates the flow of water and controls the temperature. A faulty or worn-out valve can result in water seeping out and infiltrating the wall cavity. It’s important to address any leaking or malfunctioning shower valves to prevent leaks from occurring.
High water pressure
High water pressure can cause stress on the plumbing system, leading to leaks in various areas, including the shower. The excessive force of water can damage pipes, connections, and fixtures, resulting in leaks. Installing a pressure reducing valve can help regulate water pressure and prevent potential damage and leaks.
Poorly waterproofed walls
If the walls surrounding the shower are not properly waterproofed, they can be susceptible to leaks. Without adequate waterproofing, water can penetrate the walls and cause damage to the underlying structure. It’s crucial to use appropriate waterproofing techniques during construction or renovations to create a reliable barrier against water infiltration.
Condensation buildup
Condensation buildup in the bathroom can contribute to shower leaks. When hot water is running in the shower, steam is produced, which can condense on surfaces, including the walls. If the bathroom lacks proper ventilation or if condensation is not effectively managed, the excessive moisture can lead to leaks and water damage. Addressing ventilation and condensation issues can help prevent shower leaks.
Structural issues
In some cases, shower leaks can be a result of underlying structural issues in the bathroom. If the walls or floors are not properly constructed or if there are issues with the building’s foundation, water can find its way into the wall cavity, leading to leaks. Identifying and addressing any structural issues is crucial to prevent ongoing leaks and minimize potential damage.
Signs of a Shower Leak
Damp or discolored walls
One of the telltale signs of a shower leak is damp or discolored walls around the shower area. If water is seeping through the walls, it can cause the paint or wallpaper to become moist, leading to discoloration or a noticeably damp feeling. Paying attention to these signs can help identify a leak early on.
Mold or mildew growth
The growth of mold or mildew is a clear indication of excess moisture and potential leaks. Mold and mildew thrive in damp environments, and a shower leak behind the wall can create the perfect breeding ground. If you notice any black or green patches on the walls or a musty odor in the bathroom, it’s essential to investigate for potential leaks.
Peeling or bubbling paint
When water infiltrates the walls due to a shower leak, it can cause the paint to peel or bubble. The moisture behind the wall can compromise the adhesion of the paint, leading to visible damage. If you notice any irregularities on the painted surface, it could be a sign of a leak.
Water stains on the ceiling below the shower
If the shower is located on an upper floor, water leaks can result in stains on the ceiling directly below the shower. These stains may appear as dark patches or discoloration, indicating that water is seeping through the floor and causing damage to the ceiling below. Identifying these stains can help pinpoint the source of the leak.
Musty odor
A persistent musty odor in the bathroom can be a strong indicator of a shower leak behind the wall. When water accumulates in hidden spaces, it can create a damp and musty smell. If you notice an unpleasant odor that doesn’t go away even after thorough cleaning, it’s necessary to investigate for potential leaks.
Visible water leak behind the wall
In some cases, you may be able to see an actual water leak behind the wall. This can manifest as drips, wet patches, or even a steady stream of water. If you observe any visible water leakage, it’s crucial to address the issue promptly to prevent further damage.
Sagging or damaged drywall
Shower leaks can cause the drywall to become damaged or sagging. The moisture can weaken the integrity of the drywall, leading to visible signs of distress. If you notice any bulging, cracks, or sagging in the walls around the shower, it’s a strong indication of a leak.
Increased water bills
Unexplained increases in water bills can sometimes be attributed to shower leaks. If there are no obvious reasons for the spike in water consumption, it’s worth considering the possibility of a hidden leak. Monitoring your water bills and investigating any significant changes can help identify potential leaks early on.
Decreased water pressure
A shower leak can affect the overall water pressure in the bathroom. If you notice a sudden decrease in water pressure specifically when using the shower, it could be an indication of a leak. The compromised plumbing system may struggle to deliver water at the usual pressure levels.
Tile or grout damage
Tile or grout damage can also signal a shower leak. Cracked tiles or crumbling grout can indicate water infiltration and potential leaks behind the wall. Regularly inspecting the condition of the tiles and grout can help identify any early signs of damage and prevent leaks from escalating.
Effects of Shower Leaks
Structural damage to the bathroom
One of the significant effects of shower leaks is structural damage to the bathroom. Water that seeps through the walls can lead to weakened structures, such as rotting wood or deteriorating drywall. Over time, this can compromise the integrity of the entire bathroom and require extensive repairs or renovations.
Growth of mold and mildew
Shower leaks promote the growth of mold and mildew, which can have adverse effects on both the aesthetics and the health of the residents. Mold and mildew can spread quickly in moist environments, leading to unsightly stains, unpleasant odors, and potential health hazards. Allergies, respiratory issues, and other health problems can arise from prolonged exposure to mold and mildew.
Health hazards for residents
Shower leaks can pose health hazards to the residents of a home. Mold and mildew growth can release airborne spores that can cause allergies, respiratory irritation, and other health problems. Furthermore, excessive moisture in the bathroom can create a breeding ground for bacteria and other pathogens, increasing the risk of infections. Addressing shower leaks promptly is crucial to maintaining a healthy living environment.
Increased water consumption and costs
Shower leaks can result in increased water consumption and higher water bills. The continuous flow of water, even if it may seem minimal, can account for a significant amount of wasted water over time. Additionally, the ongoing leak can put strain on the plumbing system, leading to further inefficiencies and increased water usage.
Decreased property value
The presence of shower leaks can significantly diminish the value of a property. Potential buyers or renters may be deterred by the prospect of costly repairs and ongoing maintenance. Additionally, visible signs of water damage or mold growth can create a negative impression and make the property less appealing. Addressing shower leaks and ensuring a well-maintained bathroom is essential to preserving the value of a property.
How to Identify the Source of the Leak
Inspecting the shower tiles and grout
To identify the source of a shower leak, it’s important to inspect the condition of the shower tiles and grout. Look for any cracks, gaps, or signs of damage that could allow water to seep through. Carefully examine the entire shower area, paying attention to corners, edges, and joints.
Checking the shower pan and drain
The shower pan and drain should also be inspected for any signs of leakage. Look for cracks or damage in the shower pan, especially around the edges and corners. Similarly, ensure that the drain is functioning properly and that there are no visible leaks or blockages.
Examining the plumbing connections
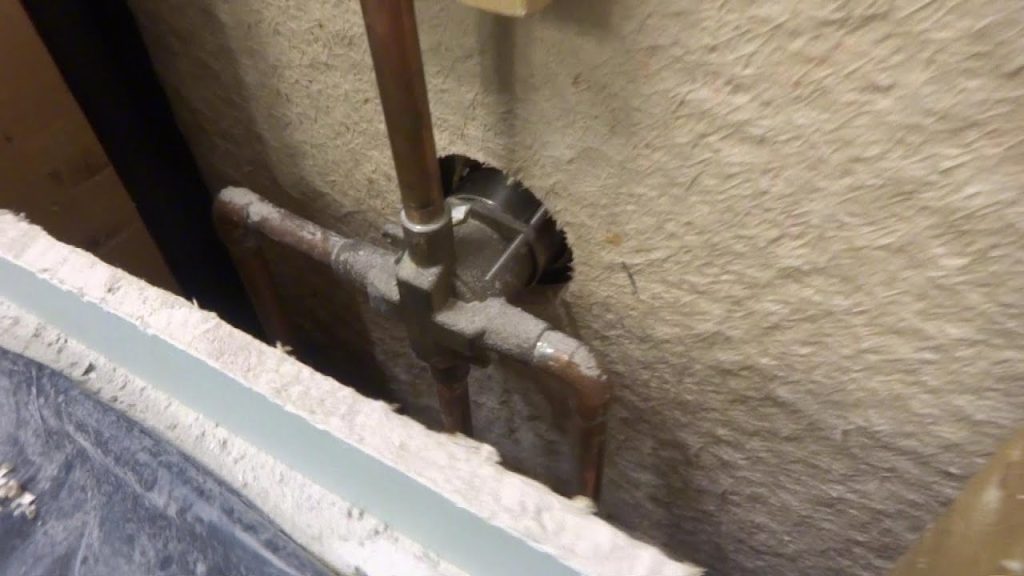
Inspect the plumbing connections behind the shower for any signs of leakage or damage. Check for loose connections, dripping pipes, or water stains. It may be necessary to access the plumbing from the wall or ceiling to thoroughly examine the connections.
Using a moisture meter
Using a moisture meter can help pinpoint the specific areas of excess moisture behind the wall. By measuring the moisture levels, you can identify areas where water infiltration is occurring and narrow down the source of the leak. This can be particularly useful when the leak is not immediately visible.
Performing a water test
A water test involves deliberately introducing water into specific areas to simulate a leak and identify its source. For example, you can pour water along the shower walls, floor, or even on nearby fixtures while someone inspects for signs of leakage behind the wall. This method can help locate the precise source of the leak.
Calling a professional plumber
If you’re unable to identify the source of the shower leak or if the issue seems complex, it’s advisable to call a professional plumber. Plumbers have the expertise, knowledge, and tools necessary to accurately diagnose and address shower leaks. They can conduct a thorough inspection, perform necessary repairs, and provide recommendations to prevent future leaks.
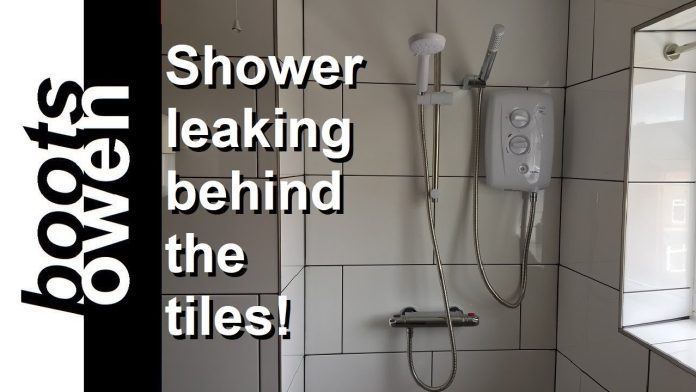
This image is property of i.ytimg.com.
Repairing Shower Leaks
Regrouting or recaulking the shower
If the shower leak is caused by worn-out grout or caulk, the first step to repair is to regroup or recaulk the shower. Remove the old grout or caulk using a grout saw or scraper, clean the area thoroughly, and apply new grout or caulk. This will create a watertight seal and prevent further leaks.
Replacing damaged or loose tiles
If there are any damaged or loose tiles contributing to the shower leak, they should be replaced. Carefully remove the affected tiles, prepare the surface, and install new tiles using the appropriate adhesive and grout. Ensuring a secure and properly sealed tile installation will eliminate potential entry points for water.
Repairing or replacing faulty plumbing connections
If the shower leak is caused by faulty plumbing connections, the affected connections should be repaired or replaced. This may involve tightening loose connections, replacing damaged pipes, or repairing faulty valves. It’s essential to work with a professional plumber for these repairs to ensure they are done correctly.
Fixing the shower pan or replacing it
A damaged shower pan should be fixed or replaced to prevent leaks. Depending on the extent of the damage, the pan may be repaired by filling cracks or applying a waterproof sealant. In more severe cases, it may be necessary to replace the entire shower pan to ensure a reliable barrier against leaks.
Sealing cracks in the shower base
Cracks in the shower base should be sealed to prevent further leaks. This can be done using a waterproof sealant or an epoxy filler specifically designed for repairing cracks in showers. Thoroughly clean and prepare the surface before applying the sealant or filler.
Repairing or replacing the shower valve
If the shower valve is the source of the leak, it should be repaired or replaced. This may involve tightening loose connections, replacing worn-out seals, or installing a new valve altogether. Again, it’s important to consult a professional plumber for these repairs to ensure proper functionality.
Installing a pressure reducing valve
If high water pressure is causing the shower leaks, installing a pressure reducing valve can help regulate water flow and prevent further damage. A pressure reducing valve is typically installed near the main water supply line to maintain a consistent and safe water pressure throughout the plumbing system.
Waterproofing the walls
If the walls surrounding the shower are not adequately waterproofed, it’s crucial to apply a waterproofing membrane or coating. This will create a barrier to prevent water from penetrating the walls and causing leaks. Follow the manufacturer’s instructions for proper application and ensure thorough coverage.
Addressing condensation issues
To address condensation issues, ensure proper ventilation in the bathroom. This may involve installing an exhaust fan or opening windows to allow for the exchange of air. Additionally, avoiding excessive moisture buildup by using a squeegee or towel to wipe down surfaces after showering can help minimize condensation-related leaks.
Fixing any structural damage
If there is any structural damage resulting from the shower leak, it should be addressed and repaired. This may involve replacing rotted wood, reinforcing weakened structures, or repairing damaged drywall. Consulting a professional contractor or handyman can ensure proper repairs are made to restore the structural integrity of the bathroom.
Preventing Shower Leaks
Regular maintenance and inspections
Regularly inspecting the shower area, including the tiles, grout, and plumbing connections, can help identify potential issues before they develop into leaks. Performing routine maintenance, such as cleaning and resealing the grout, can also prevent deterioration and leaks.
Sealing tiles and grout properly
Properly sealing the tiles and grout during initial installation and periodically thereafter is essential for preventing shower leaks. Use a high-quality sealant or grout sealer to create a waterproof barrier that protects against water infiltration. Reapply the sealant as recommended by the manufacturer to maintain its effectiveness.
Properly installing the shower pan and drain
Ensuring that the shower pan and drain are properly installed during construction or renovation is crucial for preventing leaks. Follow manufacturer guidelines and industry best practices to guarantee a watertight seal between the shower pan, drain, and surrounding surfaces.
Using appropriate waterproofing techniques
In addition to sealing tiles and grout, using appropriate waterproofing techniques is essential for preventing shower leaks. Apply a waterproofing membrane or coating to the walls surrounding the shower area, paying particular attention to corners, seams, and junctions. This will create a robust barrier against water penetration.
Monitoring water pressure
Regularly monitor the water pressure in your plumbing system to ensure it remains within a safe and optimal range. If the water pressure is consistently high, consider installing a pressure reducing valve to prevent potential leaks and protect the plumbing system.
Addressing condensation and ventilation
Proper ventilation and condensation management are crucial for preventing shower leaks. Install an exhaust fan in the bathroom to remove excess moisture and promote adequate air circulation. If condensation remains an issue, consider using a dehumidifier or taking additional measures to control moisture levels.
Hiring professionals for installation or repairs
When it comes to shower installation or repairs, it’s advisable to hire professionals with experience and expertise. Professional plumbers, contractors, or waterproofing specialists can ensure that all installations are done correctly and all repairs are completed to a high standard. This will minimize the risk of future leaks and ensure the longevity of the shower.
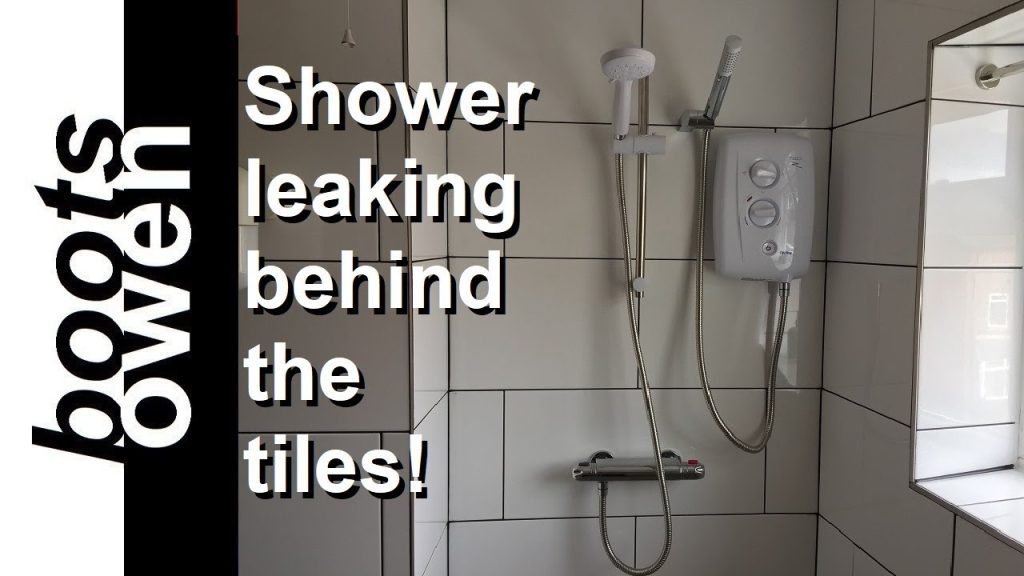
This image is property of i.ytimg.com.
Conclusion
Shower leaks can have detrimental effects on the bathroom, the health of the residents, and the value of the property. Identifying the common causes of shower leaks, recognizing the signs, and understanding the necessary repairs and preventative measures are crucial for maintaining a leak-free and healthy bathroom. By regularly inspecting and maintaining the shower, addressing any issues promptly, and seeking professional help when needed, it is possible to prevent leaks and enjoy a worry-free showering experience.


