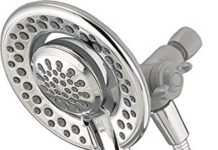
Looking to upgrade your bathroom routine? We’ve got you covered! In this article, we will guide you through the step-by-step process of installing a shower hose. Whether you’re a seasoned DIY enthusiast or a beginner, fear not! We will break it down in a simple, easy-to-follow manner, ensuring that you can enjoy the convenience of a shower hose in no time. So grab your tools and let’s get started on this exciting bathroom project!
Table of Contents
Preparing for Installation
Gathering the necessary tools and materials
Before diving into the task of installing a new shower hose, it’s important to gather all the necessary tools and materials. You will need a few basic items such as an adjustable wrench, plumber’s tape, a bucket, and a cloth or towel to help with any potential water spills. Additionally, make sure to have the new shower hose handy, along with any accompanying components or fittings.
Inspecting the shower area
To ensure a smooth installation process, it’s essential to thoroughly inspect the shower area before getting started. Take a close look at the existing showerhead and the connection point on the wall. This will allow you to assess the condition of the current hose and identify any potential issues that may need to be addressed before proceeding with the installation.
Turning off the water supply
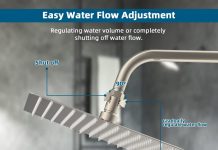
Safety is always a top priority when working with any plumbing fixtures. Before removing the old shower hose, it is crucial to turn off the water supply. Locate the shut-off valve for the shower in your home and close it by turning it clockwise. By doing this, you can prevent any potential water leaks or damage during the installation process, ensuring a hassle-free experience.
Removing the Old Shower Hose
Locating and identifying the old hose
To remove the old shower hose, you’ll first need to locate it. Typically, the hose is connected to the showerhead on one end and the wall outlet on the other. Take note of how it is secured to both ends, as this will help guide you during the removal process.
Disconnecting the old hose from the showerhead
Using your adjustable wrench, carefully loosen the connection between the old hose and the showerhead. Turn the wrench counterclockwise to loosen the nut securing the hose. Once loose, you should be able to detach the hose from the showerhead by hand. Make sure to catch any excess water that may drip out during this step using a bucket or towel.
Removing the old hose from the wall connection
Similar to the previous step, use the adjustable wrench to loosen the nut connecting the old hose to the wall outlet. Turn the nut counterclockwise until you can freely remove the old hose from the wall connection. Be prepared for any residual water to escape, so having a towel or bucket ready is always a good idea.
Choosing a New Shower Hose
Determining the desired length and flexibility
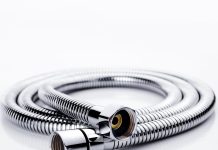
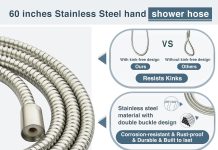
Choosing the right shower hose involves considering several factors, such as length and flexibility. Measure the distance from the showerhead to the wall outlet to determine the appropriate length for your new hose. Additionally, consider the flexibility you desire in a shower hose. Some hoses are more rigid, while others offer greater flexibility for ease of use. Consider your personal preferences and the needs of your household when making this decision.
Selecting the appropriate material and finish
There are various materials and finishes available for shower hoses, and selecting the right one is crucial for both functionality and aesthetics. Common materials include stainless steel, chrome-plated metal, or plastic. Each material offers different levels of durability, resistance to corrosion, and overall appearance. Take into account factors such as the style of your bathroom and the level of maintenance you are comfortable with when choosing the material and finish for your new shower hose.
Installing the New Shower Hose
Attaching the new hose to the showerhead
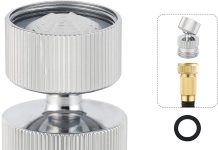
Begin the installation process by connecting the new shower hose to the showerhead. Apply plumber’s tape to the threaded portion of the showerhead to create a watertight seal. This simple step helps prevent leaks in the future. Next, hand-tighten the hose onto the showerhead, ensuring a secure connection. Avoid over-tightening, as that could potentially damage the threads or cause leaks.
Connecting the new hose to the wall outlet
Similar to attaching the hose to the showerhead, apply plumber’s tape to the threaded portion of the wall outlet. This will ensure a tight and leak-free connection. Carefully screw the end of the new hose onto the wall outlet, making sure it is secure but not overly tightened. Verify that the connection is tight enough to prevent leaks but not so tight that it is difficult to remove in the future if necessary.
Securing the hose connections
After attaching the new shower hose to both the showerhead and wall outlet, it’s important to double-check the connections for any potential leaks. Turn on the water supply and inspect the connections closely. If you notice any drips or leaks, try tightening the connection slightly to achieve a better seal. In the event of stubborn leaks, consider applying a bit more plumber’s tape to create a more secure seal. Remember, a well-installed shower hose should be leak-free, providing you with a reliable and enjoyable shower experience.
Testing and Finalizing the Installation
Checking for leaks
With the new shower hose securely installed, it’s time to test for any leaks. Carefully turn on the water supply and observe the connections closely. Check both the showerhead and the wall outlet connection points for any signs of dripping water or leakage. If you notice any leaks, diagnose the issue by identifying the source and proceed with the necessary adjustments, such as tightening the connections or applying more plumber’s tape.
Testing the functionality of the shower hose
Once you’ve confirmed that there are no leaks, it’s important to test the functionality of your newly installed shower hose. Adjust the shower controls to allow water flow through the hose. Test both hot and cold water settings to ensure a consistent water stream without any disruptions or irregularities. Verify that the hose provides the desired flexibility and ease of use, allowing you to enjoy a satisfying shower.
Cleaning up the work area
With the installation complete and your new shower hose functioning correctly, it’s time to tidy up the work area. Dispose of any packaging materials, leftover plumber’s tape, or other debris from the installation process responsibly. Wipe down the shower area to remove any water spills or markings left behind during the installation. Leaving the work area clean and organized will not only enhance the overall appearance of your bathroom but also provide a sense of accomplishment for a job well done.
Installing a shower hose can be a simple and rewarding DIY project that enhances your showering experience. By following these step-by-step instructions and taking the time to gather the necessary tools and materials, inspect the shower area, and carefully choose the right shower hose, you’ll be well-prepared to tackle this task with confidence. Whether you’re replacing an old hose or upgrading to a new one, the installation process remains relatively straightforward. Remember to prioritize safety, test for leaks, and enjoy the convenience and comfort of your new shower hose.


