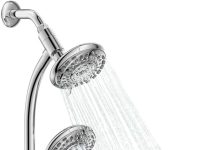
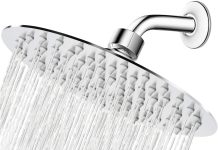
Are you tired of stepping into the shower only to be greeted by weak water flow and unsightly mineral deposits on your shower head?
Look no further! In this article, we will guide you through the simple and effective methods to restore your shower head to its former glory. Say goodbye to clogged nozzles and hello to a refreshing shower experience.
Leave the scrubbing and scraping behind, as we share our tried and tested tricks to easily remove those stubborn mineral deposits. You’ll be amazed at the difference a clean showerhead can make, and we’re here to show you how.
This image is the property of www.themakeyourownzone.com.
Table of Contents
Causes of mineral deposits on shower heads
Hard water
Hard water is one of the leading causes of mineral deposits on shower heads. Hard water contains a high concentration of minerals such as calcium, magnesium, and iron. When hard water flows through your shower head, these minerals can accumulate and form stubborn deposits.
High mineral content in water
In addition to hard water, another common cause of mineral deposits on shower heads is water with a high mineral content. Even if you don’t have hard water, the minerals in your water supply can still lead to the buildup of deposits on your shower head over time. These minerals can adhere to the surface of the shower head and eventually cause blockages and reduced water flow.
Effects of mineral deposits
Clogged water flow
Mineral deposits can gradually build up inside the small openings and nozzles of your shower head, leading to clogged water flow. As the deposits accumulate, they can restrict the passage of water, resulting in a weaker and less efficient shower experience. This can be frustrating when you’re trying to enjoy a refreshing shower.
Reduced water pressure
Along with clogged water flow, mineral deposits can also contribute to reduced water pressure. As the deposits accumulate and block the water flow, the water’s pressure from the shower head may decrease. This can make it difficult to rinse off shampoo and soap efficiently, prolonging the time you spend in the shower.
Uneven spray pattern
Another effect of mineral deposits on shower heads is an uneven spray pattern. As the deposits accumulate and disrupt the flow of water, the spray pattern may become irregular, causing water to spray in different directions. This can result in an inconsistent shower experience and make it challenging to rinse off properly.
Materials needed for cleaning
To effectively clean the mineral deposits off your shower head, you will need a few basic materials:
White vinegar
White vinegar is a highly effective natural cleaning agent that can help dissolve and remove mineral deposits from your shower head. Its acidic properties make it ideal for breaking down the minerals and restoring the functionality of your shower head.
Baking soda
Baking soda is another versatile cleaning agent that can be used to tackle stubborn mineral deposits. When mixed with water or vinegar, baking soda forms a paste that can gently scrub away the deposits without damaging the surface of your shower head.
Toothbrush
A toothbrush with soft bristles is an excellent tool for scrubbing off mineral deposits from the nozzles and crevices of your shower head. Its small size and bristle flexibility allow for precise cleaning and effective removal of deposits.
Plastic bag
A plastic bag will be handy for specific cleaning methods, where you can soak or attach it to the shower head to dissolve and remove the mineral deposits effectively.
Rubber band
A rubber band will help secure the plastic bag over the shower head, enabling the cleaning solution to work on the deposits without any leakage.
Wrench
Depending on the design of your shower head, you may need a wrench to remove and reattach it for thorough cleaning. This will ensure you can access all the necessary areas to obliterate the mineral deposits.
Method 1: Soaking in vinegar solution
Remove the showerhead.
Start by unscrewing the shower head from the shower arm using a wrench. Gently turn it counterclockwise until it detaches for easy cleaning.
Create a vinegar solution.
Mix equal parts of white vinegar and water in a bowl or container to create a vinegar solution. The exact measurements may vary depending on your container’s size and the mineral deposits’ severity.
Soak the showerhead.
Place the shower head into the vinegar solution, ensuring that it is fully submerged. You can use a larger container or a plastic bag filled with the vinegar solution to soak the shower head.
Scrub off deposits
After letting the shower head soak in the vinegar solution for at least 1-2 hours or overnight, remove it from the solution. Use a toothbrush or a soft-bristled brush to remove the loosened mineral deposits. Pay close attention to the nozzles and crevices where deposits tend to accumulate.
Rinse and reattach the showerhead.
Thoroughly rinse the shower head with water to remove any remaining vinegar solution and loosened deposits. Ensure that all the nozzles are clear of any residue before reattaching the shower head to the shower arm. Use a wrench to securely tighten the shower head, and enjoy the improved water flow.
This image is the property of www.themakeyourownzone.com.
Method 2: Using baking soda paste
Disconnect the showerhead
Before starting the cleaning process, detach the shower head from the shower arm using a wrench. This will allow you to have better access to all the surfaces that need cleaning.
Make a baking soda paste.
In a small bowl, mix a sufficient amount of baking soda with water or vinegar to form a thick paste. The paste consistency should be similar to toothpaste, which will make it easier to apply and scrub off the mineral deposits.
Apply the paste
Using your fingers or a brush, generously apply the baking soda paste onto the shower head. Make sure to cover all areas affected by the mineral deposits, focusing on the nozzles and other hard-to-reach spots.
Scrub and rinse
Gently scrub the baking soda paste onto the deposits with a toothbrush or soft-bristled brush. The paste will help break down the mineral buildup, making removing it easier. After thorough scrubbing, rinse the shower head with water to wash away the paste and loosened deposits.
Reinstall the showerhead.
After rinsing, ensure that the shower head is free from any remaining baking soda paste. Reattach the shower head to the shower arm, ensuring a secure fit. Use a wrench to tighten the shower head and test the improved water flow.
Method 3: Using a plastic bag and vinegar
Fill a plastic bag with vinegar
Pour enough white vinegar into a plastic bag to fully submerge the shower head later. Ensure that the bag is large enough to accommodate the shower head and that it can be securely attached.
Attach the bag to the shower head.
Carefully position the plastic bag filled with vinegar over the shower head. Ensure that the nozzles are fully immersed in the vinegar solution. Use a rubber band to secure the bag tightly around the neck of the shower head, preventing any leakage.
Leave it overnight
Allow the plastic bag, with the shower head immersed in vinegar, to sit overnight. This timeframe will give the vinegar sufficient time to dissolve and loosen the mineral deposits.
Remove the bag and scrub.
In the morning, remove the plastic bag from the shower head, taking care not to spill any vinegar. Use a toothbrush or a soft-bristled brush to scrub away the loosened deposits from the surface and nozzles of the shower head.
Finish with a rinse.
Thoroughly rinse the shower head with water to wash away the vinegar solution and any remaining deposits. Ensure that all the nozzles are clear and free from any residue before reattaching the shower head to the shower arm.
This image is the property of www.stain-removal-101.com.
Method 4: Dissolving mineral deposits with vinegar
Fill a plastic cup with vinegar
Take a plastic cup and fill it with white vinegar. The cup should have a large enough opening to accommodate the shower head later during cleaning.
Hold the cup over the showerhead.
Position the cup filled with vinegar over the shower head, ensuring that the nozzles are completely submerged in the vinegar. Hold the cup firmly, ensuring it doesn’t slip or spill.
Secure with a rubber band.
Once the cup is in position, use a rubber band to secure it firmly around the shower head. The rubber band will hold the cup securely, allowing the vinegar to dissolve the mineral deposits effectively.
Allow the vinegar to loosen deposits.
Leave the cup attached to the shower head for at least 1-2 hours to allow the vinegar sufficient time to dissolve and loosen the mineral deposits. This will make it easier to remove the deposits during the scrubbing process.
Scrub and rinse
After the vinegar has had time to work its magic, remove the cup from the shower head. Use a toothbrush or a soft-bristled brush to gently scrub away the loosened deposits. Once the deposits have been thoroughly scrubbed, rinse the shower head with water to remove any remaining vinegar solution and debris.
Method 5: Removing deposits with a toothbrush
Dip a toothbrush in vinegar
Take a toothbrush and dip the bristles into a bowl or container of white vinegar. Make sure the bristles are thoroughly saturated with the vinegar, as this will enhance the cleaning properties.
Scrub the showerhead.
Using the vinegar-soaked toothbrush, start scrubbing the surface of the shower head. Pay close attention to areas with prominent mineral deposits, such as the nozzles and crevices. The acidic properties of vinegar will help break down the deposits, making them easier to remove.
Pay attention to nozzles.
To ensure effective cleaning, carefully scrub the nozzles of the shower head to remove any stubborn mineral deposits. Gently scrub each nozzle with the vinegar-soaked toothbrush to dislodge and dissolve the buildup.
Rinse thoroughly
After scrubbing, rinse the shower head with water to wash away any leftover vinegar solution and the loosened mineral deposits. Ensure all the nozzles are clear and free from residue, promoting unobstructed water flow.
This image is the property of dreamcleanidaho.com.
Preventing mineral deposits
Use a water softener.
To prevent mineral deposits from forming on your shower head in the future, consider installing a water softener. Water softeners work by removing the minerals responsible for hard water, ensuring that your water supply is free from excessive mineral content.
Install a shower head filter.
Another preventive measure is to install a shower head filter. These filters can help reduce the mineral content in the water, preventing deposits from accumulating on the shower head. Shower head filters are readily available and easy to install, providing a long-lasting solution.
Regularly clean the showerhead.
Regularly cleaning your shower head is essential to prevent mineral deposits from building up over time. You can ensure optimum water flow and a refreshing shower experience by incorporating a cleaning routine into your regular maintenance schedule.
Safety precautions
Turn off the water supply.
Before starting any cleaning method, always turn off the water supply to prevent accidental spraying or leakage. This will ensure your safety and prevent potential damage to the surrounding area.
Follow the manufacturer’s instructions.
Different shower heads may have specific cleaning instructions provided by the manufacturer. It’s essential to follow these instructions to avoid using any cleaning agents or methods that may damage the shower head or void its warranty.
Use gloves when handling chemicals.
When working with cleaning solutions, especially those containing vinegar or baking soda, it’s advisable to wear gloves to protect your skin from any potential irritation. This will also provide an added layer of safety when handling chemical substances.
Following these straightforward methods and incorporating preventive measures, you can effectively remove mineral deposits from your shower head, restore water flow, and enjoy a revitalized showering experience. Remember to prioritize safety precautions and consult the manufacturer’s instructions specific to your shower head for the best results. Happy showering!
This image is the property of i.ytimg.com.


